
Introduction
find.OSINT-tool.com is basically a quick and dirty site that answers the question - what does the Internet know about XXX - where XXX is an email address, phone number, name, alias etc. etc. The site is meant to be super easy to use and without mess and fuss.
Let’s see how it works:
Input
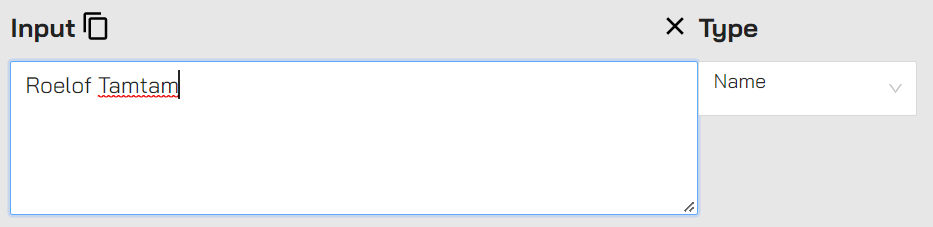
The input section is super easy - enter the thing/object/entity — call it what you want, that you want info on. Just enter the text:
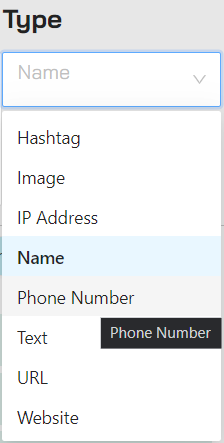
Based on the input the type is automatically set (basic regex) - but you can override it at any time. If there is a compelling reason for you to treat the text as an phone number you can just override the type manually:
The only vaguely interesting bit about entering text here is that you can enter multiple lines - the type needs to stay the same though.
You can also copy the text in the textbox to the clipboard by clicking on the copy icon and you can click on X to clear the textbox.
Actions
There are two things you can do with the object you’ve entered. You can either go to a useful website using a prepopulated link or you can send the object to an service’s API call. Let’s see how this works:
Links
These are literally just that - a collection of links based on the object type. For example - this is what it looks like (today) for the hashtag type:
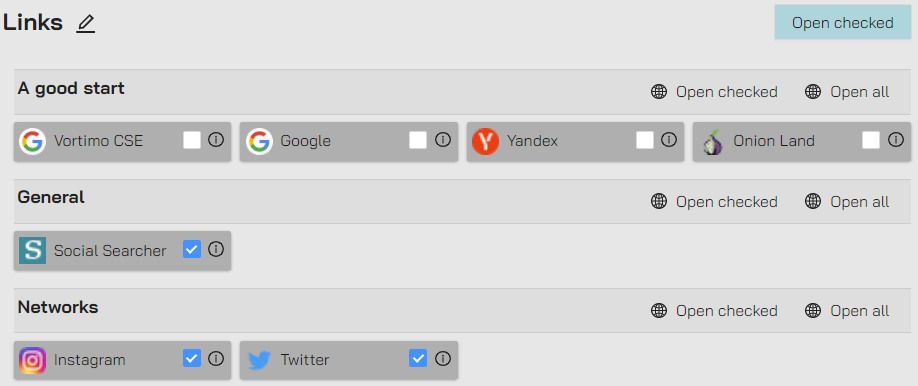
There are a few things to notice here. Firstly - every link has a checkbox. This is important and we’ll see later in the doc why. There are sections - these are kind of groups of links. It’s loosely based on the type of service. But it’s only a suggestion really.
You can open all links in the section by clicking on the ‘Open All’ button. You can also open all the checked items by clicking on the ‘Open checked’ button.
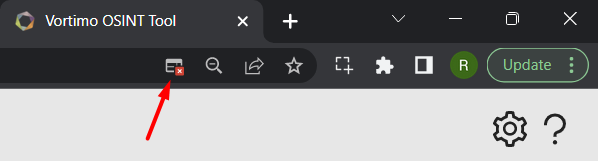
Finally there is a ‘Open checked’ button at the top - this will open all the links that have checkboxes in one go. In order to get the browser to open links all at once you need to allow the OSINT-tool website to open multiple tabs at once. The first time you open multiple links the browser will have a small pop-up just next to the address bar:

Once you done this once you’re good to go for the future - you can now open multiple tabs at once.
In most cases the tool tries to populate the correct GET parameters to the target site. We cannot populate POST parameters (browser limitation) so in a minimal numbers or sites you might needs to manually re-enter the value.
Widgets
Widgets is code. The code takes the input - the object you’ve entered - and sends it to the relevant service’s API. It gets the response and renders it in a useful and nice format. The code runs on AWS as a Lambda function (and we don’t log or record passed values). The output is saved in the local storage of the browser - in other words - we don’t save/record/keep the output at all.
Why is this useful? Well - because you can run all services against a (list of) value(s) at once and have the output in a standard form. ‘Kitchen sinking’ is what we call it. In the Maltego world it’s “Run all transforms” 🙂 Of course - you will need an API key for the service.
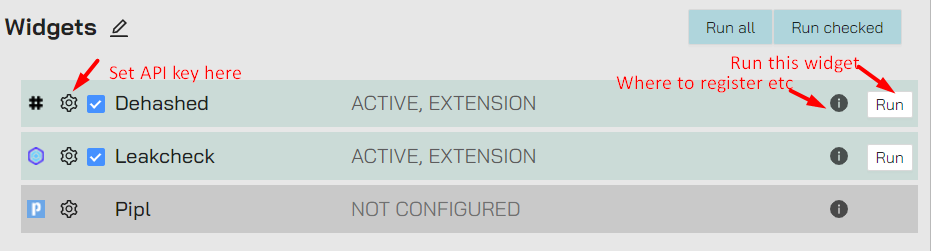
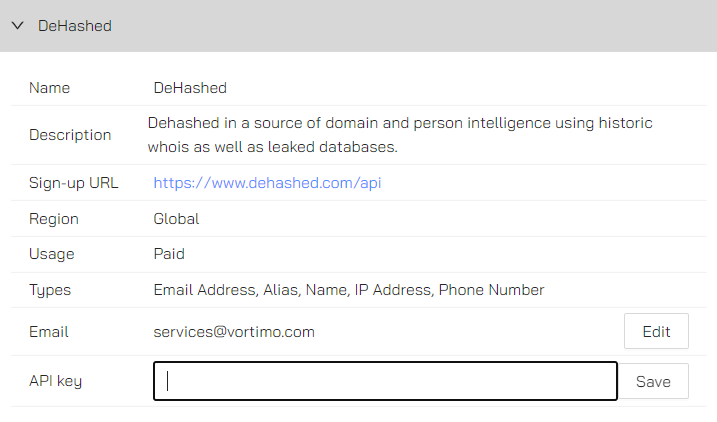
To set the API key, click on the gear icon next to the widget and set the API key and/or other information that the service needs:
When a service has all the fields (API key, etc.) populated you’ll see that it changes from ‘NOT CONFIGURED’ to ‘ACTIVE’ and the item moves up in the list. The tool does not know if the key is valid - it just knows it’s populated.
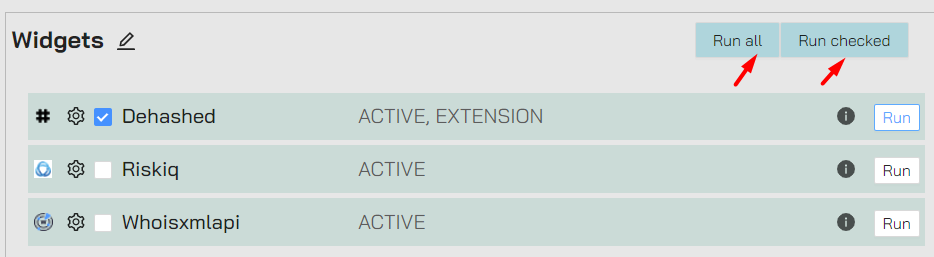
There are two extra actions - run all and run all checked. These are kind of obvious:
You might see that widgets also has checkboxes. These will be discussed in the next section.
Integration with OSINT-tool browser extension
The web application can run 100% on it’s own and stand-alone. It does not need a browser extension at all. But, when you’ve installed the browser extension (see all the other sections in this document that mentions the ‘action menu’) you’ll find that the links and widgets that are checked shows up in the extension.
This is what the checkboxes are for. If you don’t fully understand this right now, don’t worry - when you read the rest of this document you’ll see.
When a widget is called from the extension the output of the widget will be kept - this shows up as a normal widget run in the output section and is searchable / saved / just like any other widget run.
Widget output section
The output of widgets are made in section - every section has an input and output. Let’s take a look at an example:
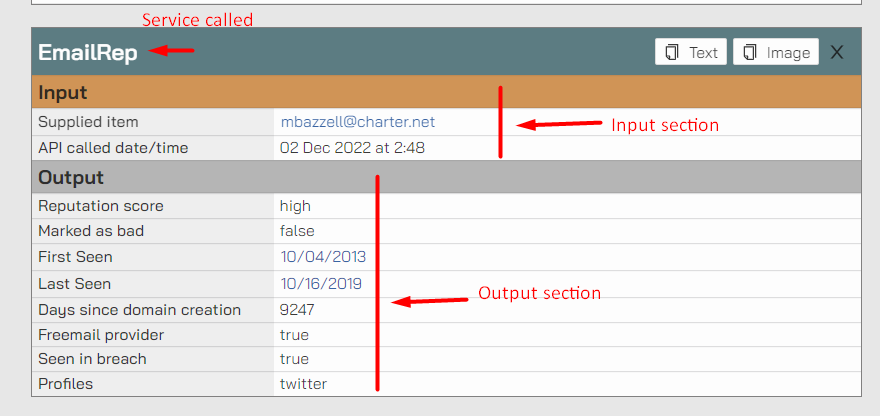
There are a few things to notice here. The first is that output can contain hyperlinks. A hyperlinked item shows up as the input when you click on it - this just makes the flow of an investigation easier. The hyperlinked items can also appear as titles - so, practically - just click on it and see what happens.
The second is three buttons at the top right of the title of the widget output:
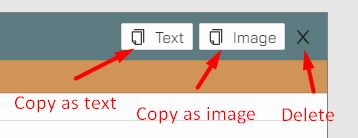
The ‘Copy as image’ is particularly useful for reports:

Use ‘Delete’ when, for instance, the widget failed or if there is no output.
Search widget output
The other very useful feature in the output section is search. To search all the output for any text simple enter it at the top - as you type it will search the output.
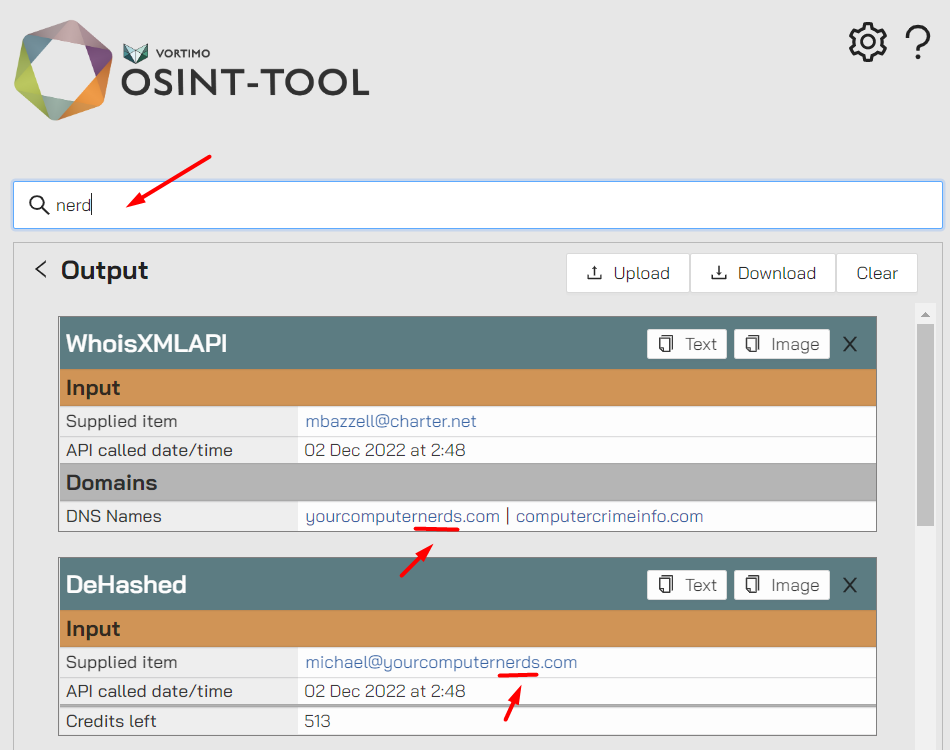
The entire widget output block is shown if the term is found anywhere within the output of the widget.
Save / Load / Clear
You can load and save the output of widgets - this will save all the widget output blocks as a JSON file. When you load the output is overridden, so make sure that’s what you want to do.
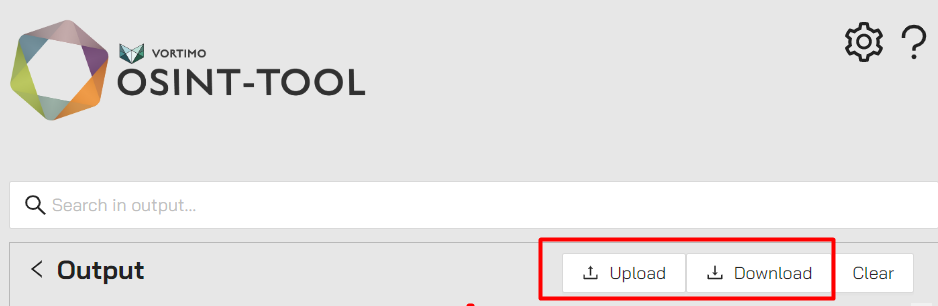
Clear does just that - it clears the output. When it’s gone… it’s gone, there’s no coming back from it.
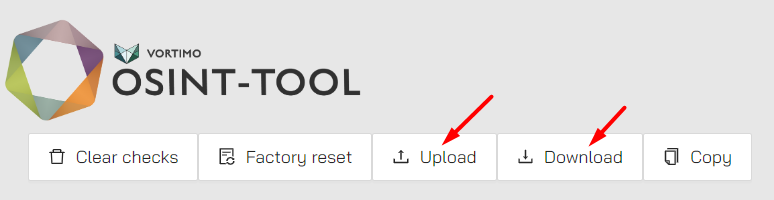
Configuration management
You can access the entire configuration in one single JSON file. Simply click on the gear in the top right hand:

This opens the configuration panel. The left shows the API key section - the right the corresponding JSON file. Changes you make on the right has immediate effect on the left and visa versa:

To easily move the entire (API key, but also checkboxes for everything) configuration around you can Download everything and Upload it on another computer / browser: